We may earn money or products from the companies mentioned in this post.
Last Updated on October 10, 2017 by Samantha Flores
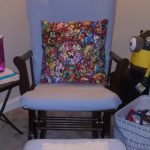
As if I’m not keeping myself busy enough with all the baby prep, work changes, babymoon planning, and everything else life has to offer, I decided to indulge in a fairly large DIY project over the weekend. We have been on the hunt for a rocking chair for when little man arrives and they have all been so over the top expensive that we just couldn’t justify paying that price for one item when we could use the money for several other items that we may need for baby. So, during a little outing to our local thrift store, I scored a used cream colored glider rocking chair with ottoman for $40!
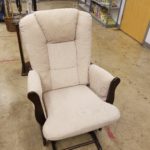
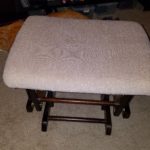
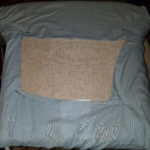
Yes, it is used and has experience caring for another family. But, that’s part of the character of the chair! Now, we get to raise our little one in it. The first thing that needed to happen was a good scrub down of the chair in addition to washing all the past away from the cushions. After the cleaning came the need for some new cushion covers. Clearly, there was a lot of growing that happened in these cushions. To save even more money AND do away with some clutter around our home, I decided for the new fabric to use a set of sheets that we had not used in a very long time and I honestly couldn’t even tell you if the sheets would have fit either of the beds that we currently have. The sheets are a powder blue color and the chair is a mocha finish. The pictures show variations of colors due to lighting, but I promise everything matches! I used the fitted sheet and one pillow case to make new covers for the cushions and ottoman (with some scraps left over).
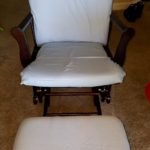
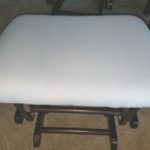
A lot of Pinterest ideas were amazing to look through when trying to figure out how to reupholster these cushions. One thing that a majority of them had in common was the use of a sewing machine. Well, I do not have a sewing machine nor do I have the patience to learn how to use one so these Pinterest ideas were clearly not going to work for me. I tried to look up the “no sew” way and found one that I could work with, but ended up using my own concoction. I used a hot glue gun to glue the fabric onto the ottoman since that cushion was not removable, then I safety pinned the fabric onto the larger cushions, and vualá! New cushions, new chair! I’m not going to lie, the underneath of the ottoman looks less than perfect and the backside of the removable cushions are pinned in no particular order. But, who’s going to see those parts anyways? I made due with the skills and tools that I had and I am happy with the outcome. 🙂
There’s a lot to be said for some DIY projects. Some can be so inspirational but are just over the top and probably require more funds to build/repurpose than if you just went out and bought a brand new version of whatever you’re trying to make. For me, this project was worth the pin pricks to my fingers in order to finally have our last big piece and not spend a fortune on it. We are only seven weeks away from our due date after all!

I love being able to be creative in my writing and crafting and I like to see where my own creativity can take me. I hope our baby boy gets my creative streak and learns to be even more imaginative, creative, and uses those skills to help Mommy retire someday! 😉
What big DIY projects have you completed?

Always,
Samantha <3
dawnwairimu
October 10, 2017 at 12:40 pmI’m so impressed! Great job on the glider! ????
Samantha Flores
October 10, 2017 at 1:06 pmThank you! I had fun doing it!????